playernav
[Player utilities]
Collaboration diagram for playernav:

|
- Synopsis
playernav requires libgnomecanvas.
- Usage
$ playernav [-fps <dumprate>] [-zoom <zoom>] [-aa {0|1}] [-map <map_idx>] <host:port> [<host:port>...]
- -fps <dumprate> : when requested, dump screenshots at this rate in Hz (default: 5Hz)
- -zoom <zoom> : initial level of zoom in the display (default: 1)
- -aa {0|1} : whether to use anti-aliased canvas for display; the anti-aliased canvas looks nicer but may require more processor cycles (default: 1)
- -map <map_idx> : the index of the map to be requested and displayed (default: 0)
playernav will connect to Player at each host:port combination given on the command line. For each one, playernav will attempt to subscribe to the following devices:
Additionally, playernav will attempt to subscribe to the following device on the first server:
- map :<map_idx>
If the subscription to the map fails, playernav will exit. If other subscriptions fail, you'll be warned, but playernav will continue. So, for example, if you just want to view a map, point playernav at a server with map :<map_idx> defined. Of course, if subscription to localize :0 or planner :0 fails for a robot, then you will not be able to localize or command, respectively, that robot.
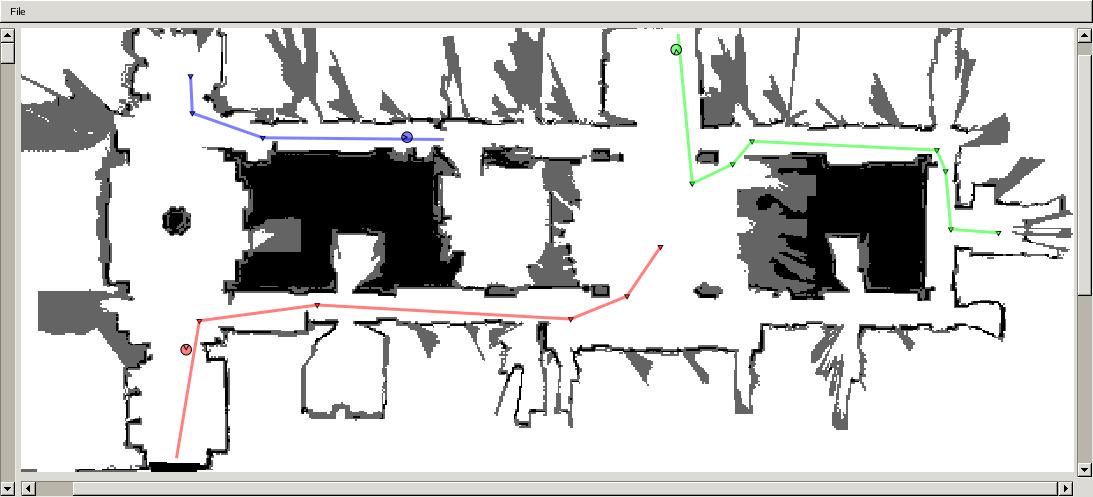
When playernav starts, a window will pop up, displaying the map. Use the scrollbars on the right and bottom to pan the window. Use the scrollbar on the left to zoom the window. An icon representing each robot will be shown. Pass the pointer over a robot to see its host:port address.
Use the "File:Capture stills" menu item to enable / disable dumping screenshots; they will be saved at the rate set on the command line (5Hz default). Beware that dumping screenshots requires significant processing and will seriously degrade performance of other jobs running on the same machine. In particular, if one or more of the player servers is running on the same machine, their localization systems may fall behind the incoming data, which will have deleterious consequences.
- Localizing and commanding robots
To set a goal for a robot, drag and drop the robot with the right mouse button to the desired position. Then click the right button again to set the desired orientation. You should see a path from the robot to the goal, with waypoints shown (if you do not see a path, then the planner probably failed to find one). You will then see the robot follow the path to the goal, with subsegments disappearing as waypoints are reached.
You can set new localization hypotheses and target at any time, even while the robot is moving.
- Stopping robots
- Screenshots

Screenshot of playernav with three robots moving toward goals
